Wedges
Wedges are the glue that holds everything together. Actually, you don’t need any wedges if you don’t move around too much or try to move the chair. But I think we all agree that having the parts nice and tight gives us a stable seat on which to plant our…seat. The goal is to have the joint locked together, a snug fit for the wedge without causing damage to either the wedge or the chair. The chairs I build come with a set of wedges specifically fit to each joint and labeled..The labels should be self-explanatory, and the writing always goes on the back side.
A properly constructed wedge will have a vertical side against the surface to be locked, such as the chair side. The opposite side should have a shallow taper. It doesn’t have to be a lot to provide the locking action. My wedges typically taper between 1/8″ and 3/16″
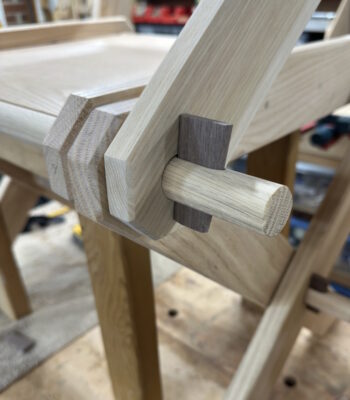
A properly fit wedge
A properly fit wedge will lock down at the point where the wedge is approximately centered vertically. Try to avoid knocking the wedge in further than necessary. You will only compress the wood and/or break out the pocket. Once compressed, you will always need to knock the wedge in that far to get a lock.
The chair requires eight wedges. In a perfect world, the joints would all be the same and the wedges would be interchangeable. That’s not the world we live in. They should all be close, and some or all will be interchangeable. Trial and error will get you there, but most likely, these are labeled in some fashion. I tend to use abbreviations like “LF” for Left Front and “RT” for Right Top. It shouldn’t be too hard to figure out.
Assembly
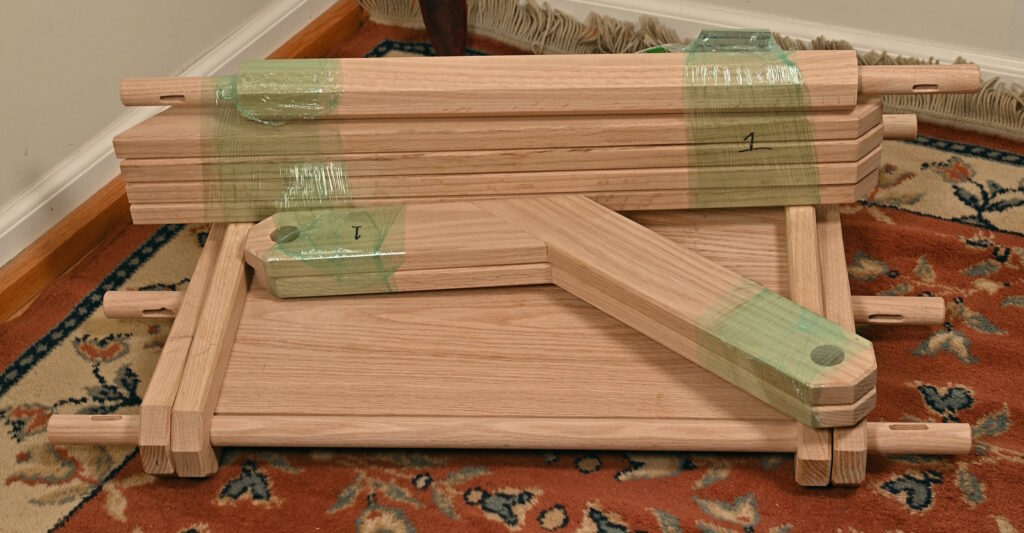
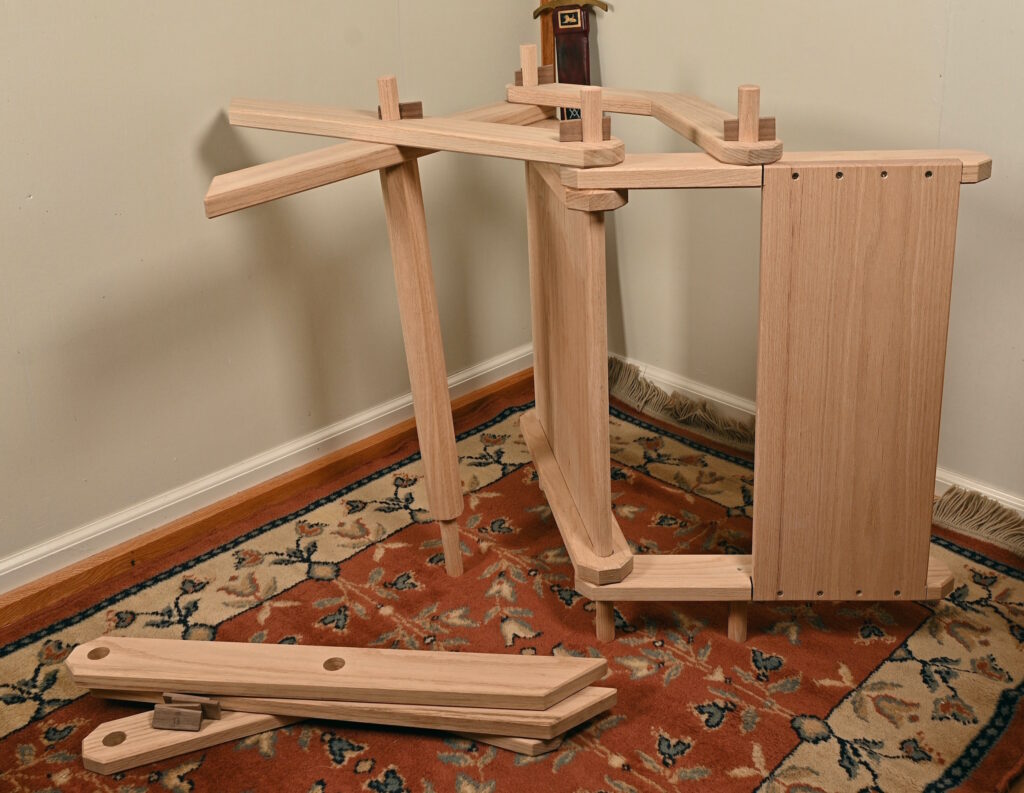
You will start with a pile of parts, as shown below. You should have:
- The folding chair body
- Two arms
- Four legs
- A lower rail
- Eight wedges
Step 1
Lay the folding section on its side and open it to approximately the right shape.
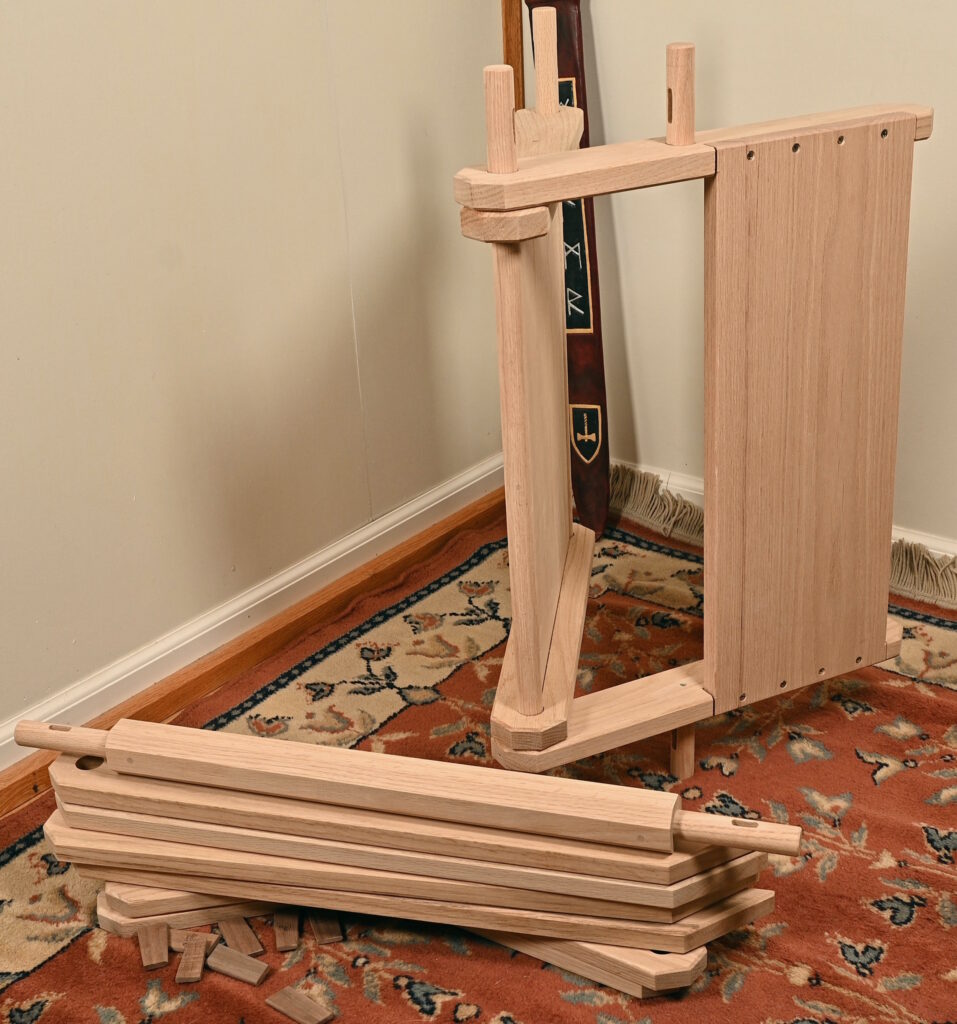
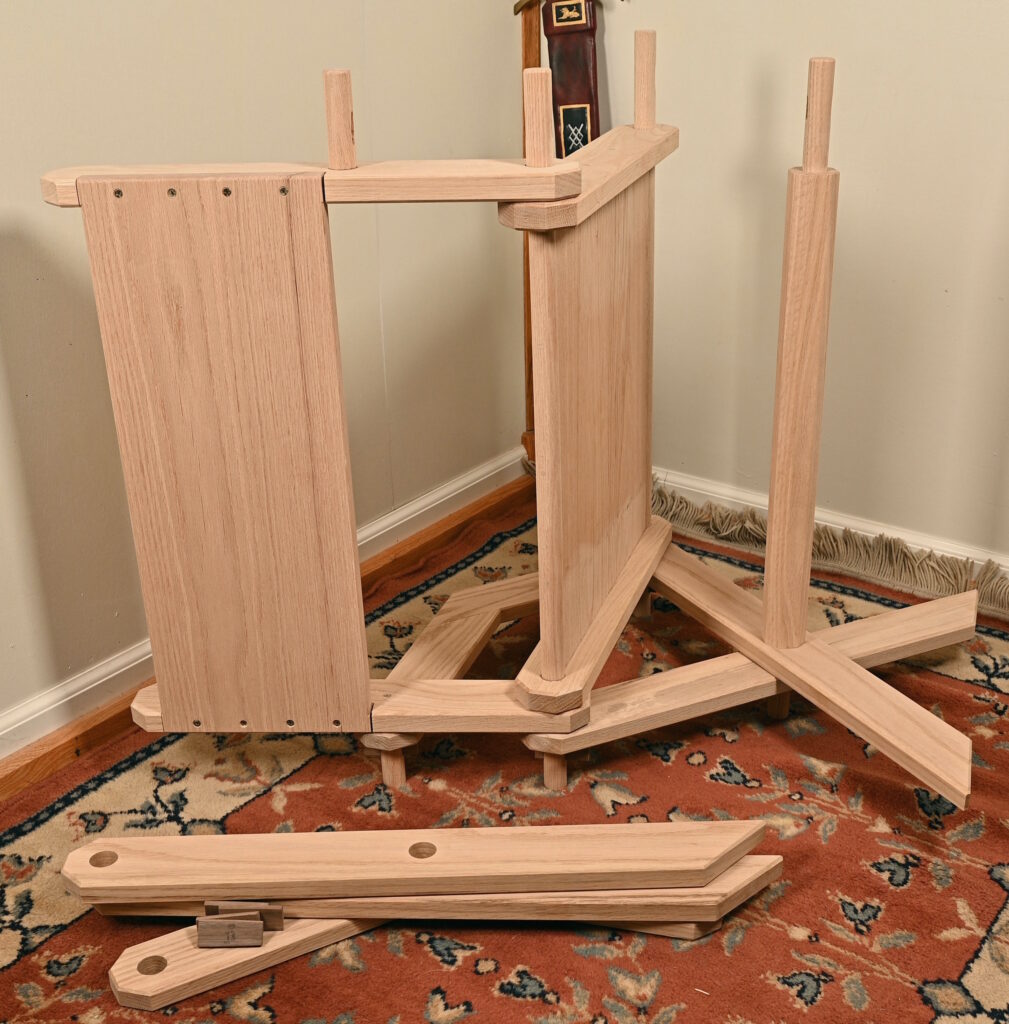
Step 2
Add one of the arms and two legs, as shown below. Pay attention to the orientation of the feet; the pointed part should point outwards.
Note that the arms are asymmetric, with one leg being longer than the other. This provides two distinct back angles—one for lounging and one for an upright position. You can choose either setting, but they must both use the same one.
Step 3
After placing the four wedges for the side, flip the chair over. It’s a little unwieldy, but the wedges will hold things in place.
Step 4
Add the remaining arm and legs. Again, pay attention to the orientation of the legs and the angle of the arm.
.

Step 5
Set the chair upright. You may need to tighten the wedges slightly.